
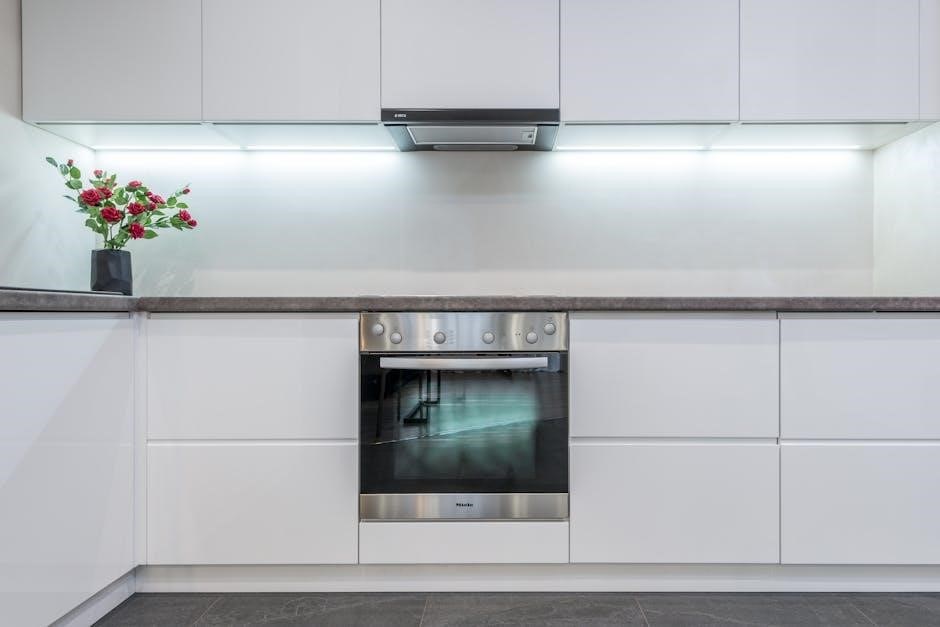
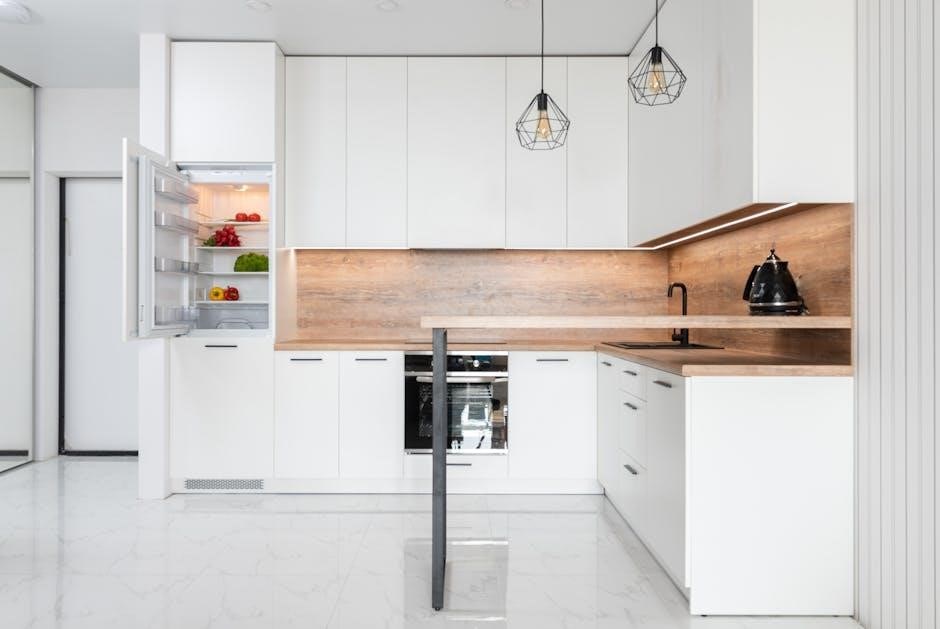
General Electric self-cleaning ovens offer innovative solutions for effortless maintenance. Using high heat, they transform food residue into ash, simplifying cleanup. Designed for convenience and efficiency, these ovens provide a modern, hassle-free cooking experience, aligning with GE’s commitment to quality and innovation in home appliances.
1.1 What Makes GE Self-Cleaning Ovens Unique
GE self-cleaning ovens stand out due to their advanced pyrolytic cleaning technology, which uses high heat to reduce food residue to ash. This feature eliminates the need for harsh chemicals, making maintenance eco-friendly and efficient. Additionally, some models include catalytic self-cleaning panels that break down grease during cooking. The combination of innovative cleaning systems, energy efficiency, and durability ensures a superior cooking experience while minimizing cleanup efforts. These ovens are designed to provide long-term performance and convenience for homeowners seeking modern, low-maintenance appliances.
1.2 Benefits of Using a Self-Cleaning Oven
Using a GE self-cleaning oven offers numerous benefits, including significant time savings and reduced effort in maintenance. The pyrolytic cleaning process eliminates the need for harsh chemicals, making it an eco-friendly option. High temperatures break down food residue into ash, which is easy to wipe away, ensuring a clean oven without scrubbing. Additionally, self-cleaning ovens are energy efficient and reduce the need for frequent manual cleaning, making them a convenient choice for busy households. This feature also helps maintain the oven’s performance and longevity, ensuring optimal cooking results over time.

Understanding the Self-Cleaning Feature
GE self-cleaning ovens use high temperatures to convert food residue into ash, simplifying cleanup. This automated process ensures efficient and thorough cleaning without manual scrubbing or harsh chemicals.
2.1 How the Pyrolytic Self-Cleaning Process Works
The pyrolytic self-cleaning process in GE ovens uses extremely high temperatures to break down food residue into ash. The oven is heated to a very high temperature, typically around 900°F (482°C), for several hours. During this cycle, food debris is incinerated, leaving behind a fine ash that can easily be wiped away with a damp cloth. The oven door is securely locked to ensure safety, and the process is designed to eliminate tough grime without the need for harsh chemicals or manual scrubbing. Once the cycle is complete and the oven cools, the ash is effortlessly removed, leaving the oven interior clean and ready for use.
2.2 Differences Between Manual and Automatic Cleaning Modes
GE self-cleaning ovens offer two cleaning modes: manual and automatic. In manual mode, users set the temperature and duration, allowing control over the cleaning process. Automatic mode, however, uses preset settings to optimize cleaning based on soil level, requiring minimal user input. Automatic mode is more convenient but may take longer, while manual mode offers flexibility for lighter cleaning needs. Both modes utilize high heat to break down food residue, but the level of user involvement and customization differs, catering to various preferences and cleaning requirements.
2.3 The Role of High Temperatures in the Cleaning Process
High temperatures are crucial in GE self-cleaning ovens, reaching up to 800-900°F during the cleaning cycle. This intense heat breaks down tough food residue and grime into ash, making it easy to wipe away after cooling. The process is highly efficient, as the heat penetrates deeply to sanitize and clean surfaces without chemicals. While manual cleaning can be done, the self-cleaning feature with high heat ensures a more thorough and hands-free experience, making maintenance simpler and more effective.
Preparing for the Self-Cleaning Cycle
Ensure safety by ventilating the kitchen and removing racks and accessories. Clean the oven door and window with gentle products. Avoid abrasive cleaners and flammable materials. Plan timing to avoid interruptions. Follow the manual’s guidelines, including checking for damage to door seals. Remove baking sheets and trays to prevent warping. Keep pets and children away due to high temperatures and fumes. Check the oven’s condition and follow specific steps for preparation to ensure an effective and safe cleaning cycle.
3.1 Essential Safety Precautions Before Starting
Before initiating the self-cleaning cycle, ensure the kitchen is well-ventilated to prevent inhaling fumes. Turn off the oven and unplug it if possible. Keep children and pets away. Avoid wearing loose clothing near the oven. Use oven mitts or tongs to handle racks. Do not leave the kitchen unattended during the cycle. Ensure the oven door is securely closed to contain heat and fumes. Never use water to stop the cycle, as it can cause damage. Always follow the manual’s guidelines to avoid accidents or oven damage.
3.2 Removing Oven Racks and Accessories
Always turn off the oven and let it cool before removing racks and accessories. Use oven mitts to protect your hands from sharp edges. Gently slide racks out and place them on a heat-resistant surface. Remove any cooking utensils or pans to ensure proper cleaning. Avoid submerging racks in water, as this can cause rust. For tough food residue, soak racks in warm soapy water before cleaning. Ensure all accessories are removed to allow the self-cleaning cycle to function effectively.
3.3 Cleaning the Oven Door and Window
Before starting the self-cleaning cycle, clean the oven door and window to ensure optimal visibility and functionality; Use a damp cloth to wipe away food splatters and grime. Avoid harsh chemicals or abrasive materials, as they may damage the glass or finish. For tougher stains, apply a gentle cleaning solution recommended by GE. Do not submerge any parts in water. Dry the surfaces thoroughly to prevent water spots. Regular cleaning helps maintain clarity and ensures the self-cleaning process works efficiently.
Operating the Self-Cleaning Cycle
Initiate the self-cleaning cycle by selecting the mode on your GE oven’s control panel. The oven uses high heat to break down food residue into ash, leaving it clean and sanitized after the process.
4.1 Step-by-Step Guide to Initiating the Cycle
Press the “Self-Clean” button on the control panel and select the desired cleaning mode. Ensure the oven is empty and racks are removed. Set the cleaning time based on soil level. Lock the oven door to activate the cycle. The oven will heat to a high temperature, converting food residue into ash. Monitor the process through the oven window. Allow the cycle to complete, then let the oven cool before wiping out ash with a damp cloth.
4.2 Understanding the Duration of the Cleaning Process
The self-cleaning cycle duration varies based on soil level and oven model. Light cleaning may take 2–3 hours, while heavy-duty cycles can last up to 5 hours; The oven locks during the process to ensure safety. High temperatures break down grime into ash. It’s best to start the cycle when you’re home to monitor progress. Always refer to your GE manual for specific time guidelines tailored to your model. Proper duration ensures a thorough clean without damaging the oven.
4.3 Managing Odors and Smoke During the Cycle
During the self-cleaning cycle, odors and smoke are common due to high heat breaking down grime. To minimize this, ensure your kitchen is well-ventilated by opening windows and turning on exhaust fans. Avoid leaving large food particles, as they intensify odors. If smoke persists, temporarily pause the cycle and let the oven cool slightly. Always follow the manual’s guidelines to prevent excessive fumes. Keeping the oven clean regularly can also reduce strong smells during future cycles.
Post-Cleaning Maintenance
After the self-cleaning cycle, inspect the oven for residue. Wipe down surfaces with a damp cloth, clean racks, and ensure the oven is dry for optimal performance and safety.
5.1 Wiping Away Ash and Residue
After the self-cleaning cycle, allow the oven to cool completely. Use a damp cloth or sponge to wipe away ash and residue from the interior surfaces. For tougher spots, a mild soap solution or white vinegar can be used. Avoid using abrasive materials to prevent scratching. Remove racks and place them in soapy water for cleaning. Ensure all surfaces are wiped clean to maintain your oven’s performance and hygiene. Regularly cleaning residue prevents future buildup and keeps the oven functioning efficiently.
5.2 Cleaning the Oven Floor and Walls
After the self-cleaning cycle, use a damp cloth or sponge to remove ash and residue from the oven floor and walls. Avoid abrasive materials to prevent scratching. For tough spots, gently scrub with a soft brush or non-abrasive scrubber. Rinse the cloth frequently to avoid spreading residue. Ensure all surfaces are clean and dry before using the oven again. Regularly cleaning the floor and walls helps maintain the oven’s efficiency and prevents food particles from burning onto surfaces during future use.
5.3 Drying the Oven After Cleaning
After cleaning, allow the oven to cool slightly before wiping down all surfaces with a clean, dry cloth. This prevents water spots and ensures a streak-free finish. For remaining moisture, leave the oven door slightly open to promote airflow. Avoid using harsh chemicals or abrasive materials, as they can damage surfaces. Proper drying is essential for maintaining the oven’s finish and preventing rust or mineral deposits. Regular drying also helps maintain hygiene and efficiency for future use.

Alternative Cleaning Methods
Explore steam cleaning, manual scrubbing, or catalytic panels for lighter maintenance, offering convenient alternatives to the self-cleaning cycle for General Electric ovens.
6.1 Using Steam Cleaning for Light Maintenance
Steam cleaning is a gentle and eco-friendly alternative for light oven maintenance. By placing a pan of water in the oven and heating it, steam loosens food residue without extreme heat. This method is ideal for minor spills and splatters, reducing the need for harsh chemicals. It’s also energy-efficient and leaves a fresh scent. For tougher spots, a mixture of water and white vinegar can enhance effectiveness. Always ensure the oven is cool before wiping down surfaces with a damp cloth after steam cleaning.
This approach is perfect for quick, regular upkeep, keeping your GE oven clean without the full self-cleaning cycle.
6.2 Manual Cleaning with Mild Soap and Water
Manual cleaning with mild soap and water is a gentle, effective method for maintaining your GE oven. Start by cooling the oven completely and removing racks for separate washing. Dampen a soft cloth with a mix of warm water and mild dish soap, avoiding harsh chemicals. Gently wipe interior surfaces, steering clear of heating elements and door seals to prevent damage; Rinse thoroughly with a clean, damp cloth to remove soap residue. This method preserves the oven’s finish and is ideal for light maintenance between self-cleaning cycles.
6.3 Catalytic Self-Cleaning Panels: How They Work
Catalytic self-cleaning panels are designed to simplify oven maintenance by breaking down food residue. These panels are coated with a special material that oxidizes food splatters when exposed to high temperatures, turning them into ash that’s easy to wipe away. They reduce the need for frequent deep cleaning and harsh chemicals, making oven upkeep more manageable. While they don’t eliminate all cleaning efforts, they significantly lighten the load. Ensure good ventilation during the heating process to handle any fumes effectively.
Safety Tips and Precautions
Always keep children away during the cleaning cycle. Ensure proper ventilation to prevent fumes from spreading. Avoid using abrasive cleaners or harsh chemicals to maintain surface integrity.
7.1 Avoiding Oven Cleaners and Abrasive Materials
Avoid using harsh chemicals or abrasive materials, as they can damage the oven’s enamel or special coatings. These products may leave residue or scratch surfaces, compromising performance. Instead, rely on the self-cleaning feature or gentle alternatives like steam cleaning for maintenance. Always follow the manufacturer’s guidelines to ensure longevity and safety. Regular use of the self-cleaning cycle reduces the need for external cleaners, preserving the oven’s finish and functionality over time.
7.2 Ventilating the Kitchen During the Cleaning Cycle
Proper ventilation is crucial during the self-cleaning cycle to prevent odors and smoke from lingering. Open windows and doors to allow fresh air to circulate. Turn on your kitchen exhaust fan to help remove fumes and particles. If possible, temporarily vacate the area to avoid inhaling strong smells. Adequate ventilation ensures a safer and more comfortable cleaning process, reducing the intensity of any unpleasant odors generated during high-temperature cycles. This step is essential for maintaining a clean and healthy indoor environment while using your GE self-cleaning oven.
7.3 Protecting Surfaces from Heat and Chemicals
To safeguard your kitchen surfaces during the self-cleaning cycle, cover nearby countertops and tables with heat-resistant mats or sheets. Remove any heat-sensitive items from the vicinity to prevent potential damage. After the cycle, ensure all surfaces are wiped clean to remove any residue or chemical particles that might have settled. This protective measure ensures your kitchen remains undamaged and maintains its aesthetic appeal even after frequent use of the self-cleaning feature. Regular maintenance and precautionary steps help preserve the longevity and appearance of your kitchen environment.

Troubleshooting Common Issues
Identify error codes, address heating issues, and resolve lingering odors. Reset the oven, check connections, and ensure proper ventilation. Deep cleaning may be necessary for persistent problems.
8.1 Dealing with Stubborn Stains and Grime
For tough stains, avoid harsh chemicals or abrasive scrubbers, as they can damage the oven’s finish. Instead, mix water and baking soda into a paste, apply to stains, and let sit overnight. Use a soft sponge or cloth to wipe away residue. If stains remain, repeat the process or run a self-cleaning cycle at a higher temperature. For lighter grime, steam cleaning with water and vinegar can loosen deposits effectively. Always follow GE’s recommended cleaning methods to maintain your oven’s condition and performance.
8.2 Resolving Error Codes During the Cleaning Cycle
If error codes appear during the cleaning cycle, refer to your GE oven manual for specific code meanings. Common codes like E1, E2, or E3 often indicate issues like temperature sensors or door lock malfunctions. Power cycling the oven (unplugging it for 30 seconds) may resolve the issue. If the problem persists, check and clean sensors, ensure the door is properly sealed, or contact GE customer support for assistance. Always follow manufacturer guidelines to avoid further complications.
8.3 Addressing Odor Lingering After Cleaning
Odors may linger after the self-cleaning cycle due to residual food particles. To address this, wipe down the oven surfaces with a damp cloth after the cycle ends. For persistent smells, mix baking soda and water to create a paste, apply it to interior surfaces, and let it sit overnight. Run a steam cleaning cycle or bake the paste at 200°F for an hour. Avoid harsh chemicals, as they can damage the oven’s finish. Always ensure the oven is cool before cleaning to prevent accidents.
Maintenance and Care Tips
Regularly wipe spills to prevent grime buildup. Check and replace oven filters for optimal performance. Clean the door seals to maintain heat efficiency and ensure even cooking results.
9.1 Regular Cleaning to Prevent Build-Up
Regular cleaning is essential to prevent grime and food residue from hardening. After each use, wipe down the oven interior with a damp cloth to remove splatters. For tougher spots, mix baking soda and water to create a paste, apply it overnight, then wipe clean. This method avoids harsh chemicals and prevents buildup. Additionally, check and replace filters regularly to ensure optimal performance. Consistent maintenance extends the oven’s lifespan and keeps it functioning efficiently, reducing the need for deep cleaning sessions.
9.2 Caring for the Oven Door and Seals
Proper care for the oven door and seals ensures optimal performance. Clean the door using a mild soap and warm water solution, avoiding abrasive scrubbers. For tougher grime, a gentle cleanser or white vinegar can be effective. Inspect door seals regularly for wear or cracks, as damaged seals reduce heat efficiency. Replace seals if necessary to maintain even heating. Avoid using harsh chemicals, as they may damage the surfaces. Regular maintenance prevents leaks and ensures a tight seal, enhancing overall oven functionality and energy efficiency.
9.3 Checking and Replacing Oven Filters
Regularly inspect and maintain your oven’s filters to ensure optimal performance. These filters trap grease and food particles, improving air quality and reducing odors. Check them every 1-2 months or when visibly soiled. Replace filters annually or as recommended. To replace, turn off the oven, remove the old filters, and install new GE-approved ones. Clean metal filters with mild soap and warm water if reusable. Proper filter maintenance enhances ventilation, prevents smoke buildup, and keeps your oven running efficiently while maintaining a cleaner kitchen environment.
Environmental and Cost Considerations

GE self-cleaning ovens offer eco-friendly benefits by reducing chemical use and energy waste. They promote efficient cleaning cycles, lowering utility bills and environmental impact over time.
10.1 Eco-Friendly Aspects of Self-Cleaning Ovens
GE self-cleaning ovens are designed with eco-friendly features, reducing the need for harsh chemical cleaners. The high-heat pyrolytic process breaks down food residue into ash, minimizing chemical use. Energy-efficient cycles lower power consumption during cleaning, aligning with green living practices. By reducing chemical waste and energy use, these ovens support environmental sustainability while maintaining cleaning effectiveness. This eco-conscious approach makes them a practical choice for homeowners seeking to reduce their environmental footprint.
10.2 Energy Efficiency of the Cleaning Cycle
GE self-cleaning ovens are designed to optimize energy use during the cleaning cycle. Advanced sensors monitor temperature and adjust energy consumption, ensuring efficient operation. The high-heat process minimizes cleaning time, reducing overall energy expenditure. While the cycle requires significant power, the oven’s insulation and smart technology work together to maintain efficiency. This balance of high performance and energy optimization makes the cleaning process more environmentally friendly and cost-effective for homeowners.
10.3 Cost Savings from Reduced Cleaning Needs
GE self-cleaning ovens offer significant cost savings by reducing the need for frequent manual cleaning. The high-heat cycle eliminates tough grime, minimizing the use of harsh chemicals and reducing water consumption. With fewer deep cleans required, homeowners save on cleaning supplies and labor. The energy-efficient design also lowers utility bills over time. By extending the time between thorough cleanings, the oven’s self-cleaning feature contributes to long-term financial savings, making it a practical investment for households seeking to reduce maintenance costs while maintaining a clean and efficient kitchen appliance.
GE self-cleaning ovens combine efficiency, convenience, and durability, making them a smart choice for modern kitchens. Regular use of the self-cleaning feature ensures optimal performance and longevity.
11.1 Summarizing the Benefits of Proper Oven Maintenance
Proper maintenance ensures your GE self-cleaning oven operates efficiently, preventing grime buildup and extending its lifespan. Regular cleaning enhances performance, reduces energy consumption, and maintains hygiene. It also prevents stubborn stains, ensuring the self-cleaning feature works effectively. A well-maintained oven minimizes the need for harsh chemicals, protecting both the appliance and the environment. By following maintenance routines, you preserve the oven’s appearance, functionality, and safety, ensuring it remains a reliable kitchen companion for years to come.
11.2 Encouraging Regular Use of the Self-Cleaning Feature
Regular use of the self-cleaning feature ensures optimal performance and longevity of your GE oven. By incorporating this habit, you eliminate tough grime and food residue effortlessly. The feature saves time and effort compared to manual scrubbing, while its high-temperature process sanitizes the oven thoroughly. Consistent use prevents stubborn stains from forming and reduces the need for harsh chemicals. Embrace this convenient and efficient cleaning method to maintain your oven’s like-new condition and enjoy a cleaner, healthier cooking environment for years to come.
Leave a Reply
You must be logged in to post a comment.